Overcoming Hardware Limitations in Deep Learning: A Guide to Cloud Training
When it comes to training large deep learning models, practitioners often encounter a myriad of challenges. From acquiring vast amounts of data to fine-tuning architectures and hyperparameters, the journey can be daunting. One of the most significant hurdles, however, is the lack of adequate hardware resources. Many of us do not have access to high-end GPUs like the NVIDIA Titan RTX or clusters of powerful PCs, which can lead to frustratingly long training times.
While the temptation to invest in a high-end GPU is understandable—I’ve been there myself—there’s a more efficient and cost-effective solution: cloud computing. Cloud providers such as Google Cloud, Amazon Web Services (AWS), and Microsoft Azure offer robust infrastructures tailored for machine learning applications. In this article, we will explore how to leverage Google Cloud to train a U-Net model for image segmentation, building on the custom training loop we developed in a previous article.
Understanding Cloud Computing
Before diving into the practical steps, let’s clarify what cloud computing entails. At its core, cloud computing is the on-demand delivery of IT resources over the internet. Instead of investing in physical servers and data centers, users can access computing power and storage from cloud providers.
Today, approximately 90% of companies utilize some form of cloud service, underscoring its significance in modern computing. The cloud offers a diverse array of systems and applications that would be impractical to maintain independently. For our purposes, we will focus on one specific service: Compute Engine. This service allows us to create virtual machine (VM) instances hosted on Google’s servers, providing the flexibility to configure our computing environment as needed.
Creating a VM Instance
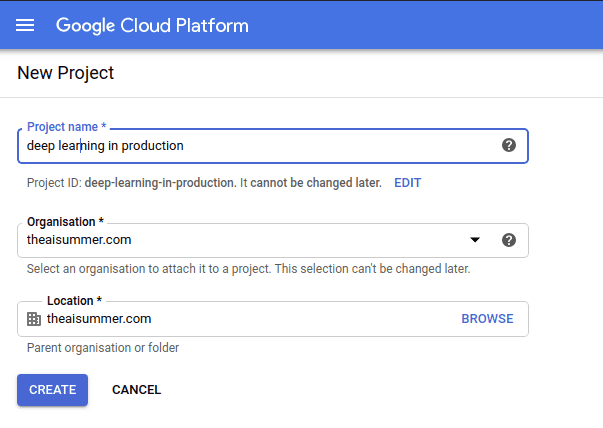
Once you’ve set up your Google Cloud account (which includes a free credit of $300 for new users), the first step is to create a new project. Simply click on “New project” in the top left corner of the Google Cloud Console and give it a name of your choice.
Next, navigate to Compute Engine > VM instances from the sidebar to create a new VM. Here, you can customize your instance according to your needs—selecting CPU, RAM, and even adding a GPU. For this tutorial, I recommend starting with a standard CPU configuration and an NVIDIA Tesla K80 GPU, along with an Ubuntu 20.04 minimal image.

Connecting to the VM Instance
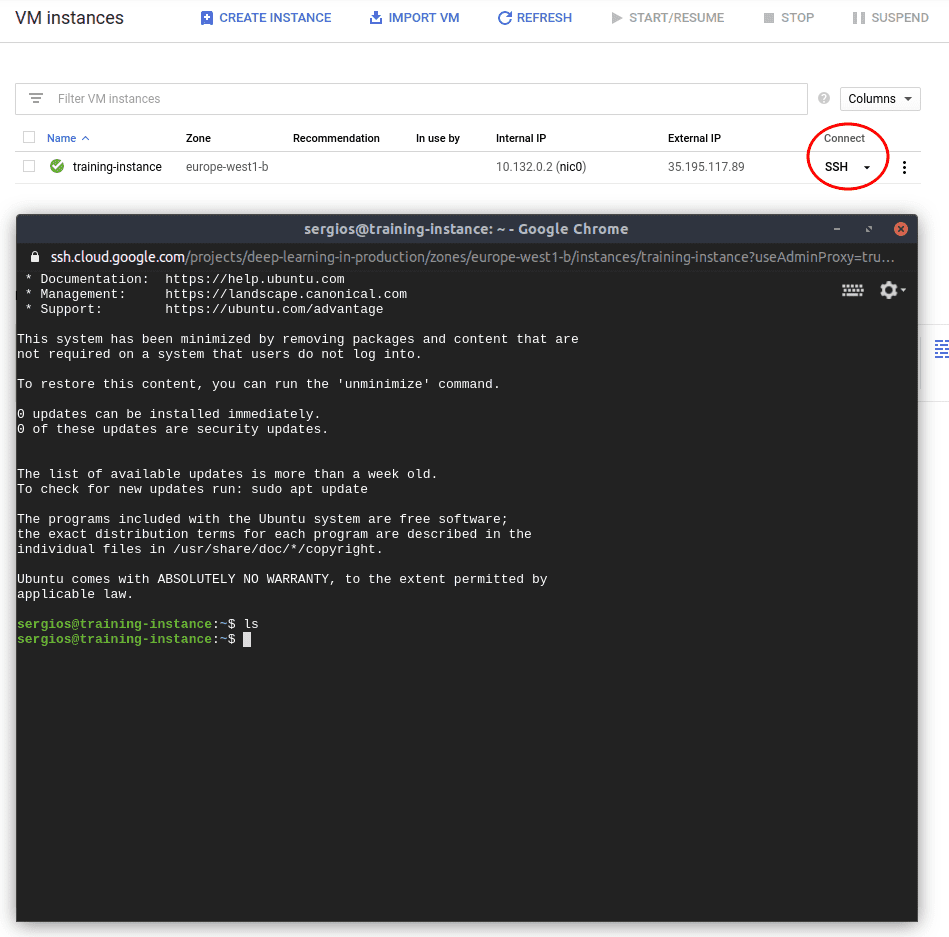
With your VM instance up and running, it’s time to connect to it. You can do this easily via SSH by clicking the SSH button in the Google Cloud Console. This action opens a new browser window, granting you terminal access to your remote machine.

Once connected, you can install any necessary software just as you would on your local machine. To facilitate file transfers between your local system and the VM, you can use the gcloud command-line tool, which simplifies authentication and file management.
Transferring Files to the VM Instance
To transfer your project files to the VM instance, use the gcloud scp command. For instance, if you want to transfer your entire project directory, you would execute:
gcloud compute scp --recurse /path/to/your/project training-instance:appThis command copies your project files to the VM, allowing you to run your training scripts remotely.

Running the Training Remotely
With your files in place, you can now execute your training script. Before running the script, ensure that you have installed all necessary dependencies, such as Python and TensorFlow. You can do this using:
sudo apt install python3-pip
pip install -r requirements.txt
Once everything is set up, simply run your training script, and the training process will commence. Google Cloud also provides pre-configured instances with essential libraries, making it easier to get started.
What About the Training Data?
A crucial aspect often overlooked is the management of training data. Instead of embedding data within your application, consider utilizing cloud storage solutions. Google Cloud offers Cloud Storage, which allows you to store and manage your data efficiently.
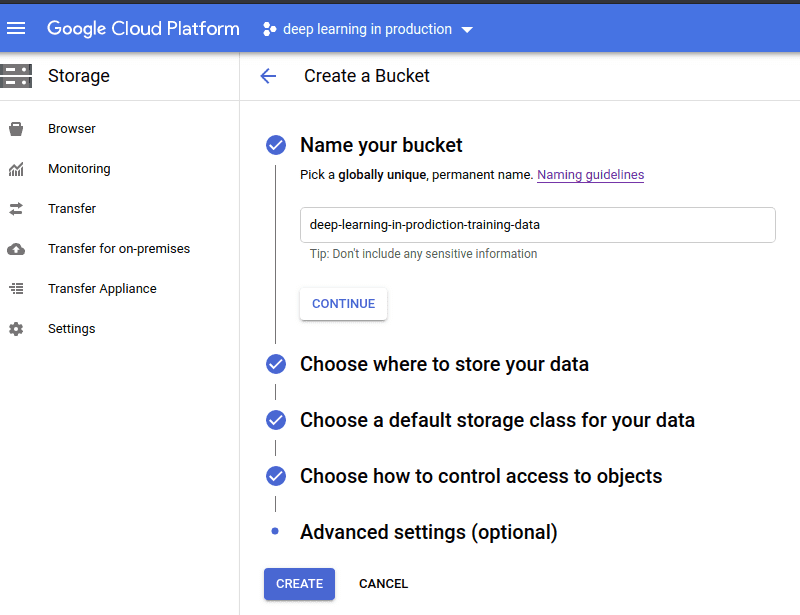
To create a storage bucket, navigate to the storage browser in Google Cloud and click “Create Bucket.” You can then upload your training data directly to this bucket.

Once your data is uploaded, you can access it during training using TensorFlow’s data input pipelines. For example:
filenames = "gs://your-bucket-name/*"
filepath = tf.io.gfile.glob(filenames)
dataset = tf.data.TFRecordDataset(filepath)
This approach allows your model to stream data directly from cloud storage during training, enhancing efficiency and scalability.
Conclusion
In this article, we explored how to leverage cloud computing to overcome hardware limitations when training deep learning models. By utilizing platforms like Google Cloud, you can access powerful resources without the need for significant upfront investment in hardware.
Cloud computing not only simplifies the training process but also offers scalability and flexibility for deploying and serving models. As we continue this series, we will delve deeper into cloud services, emphasizing their importance in modern machine learning workflows.
If you found this article helpful, consider sharing it with others interested in deep learning and cloud computing. For further learning, I recommend the TensorFlow: Advanced Techniques Specialization on Coursera, which provides a solid foundation in TensorFlow.
Stay tuned for more insights and tutorials on AI and machine learning!
